Make a Bunny Bookmark

As Easter arrives, April autumn showers can start tumbling down. This is a great time to leap into an exciting book.
To make your reading even more fun for Easter we want to show you how to make a bunny bookmark!
What you need:
An old envelope.
Small piece of white paper (for the teeth).
Scissors.
Glue or double-sided tape.
Pens, pencil and light pink pencil.
Ruler.
How to make the head
Use a ruler to draw a line across the bottom corner of the envelope. Make sure your triangle is the same length on the two opposite sides. (Double check it will fit your book page before you cut it out).
Now cut along your pencil drawn line to make the triangle.
To give your bunny round cheeks; use a ruler to find the centre point of the open edge of the triangle. This will give you a guide of where to pencil in the shape of his cheeks. When you are happy with the shape you have drawn cut it out.
Tip: Make sure you DON’T trim off more than half of the closed edges, that’s what will keep your bookmark in place.
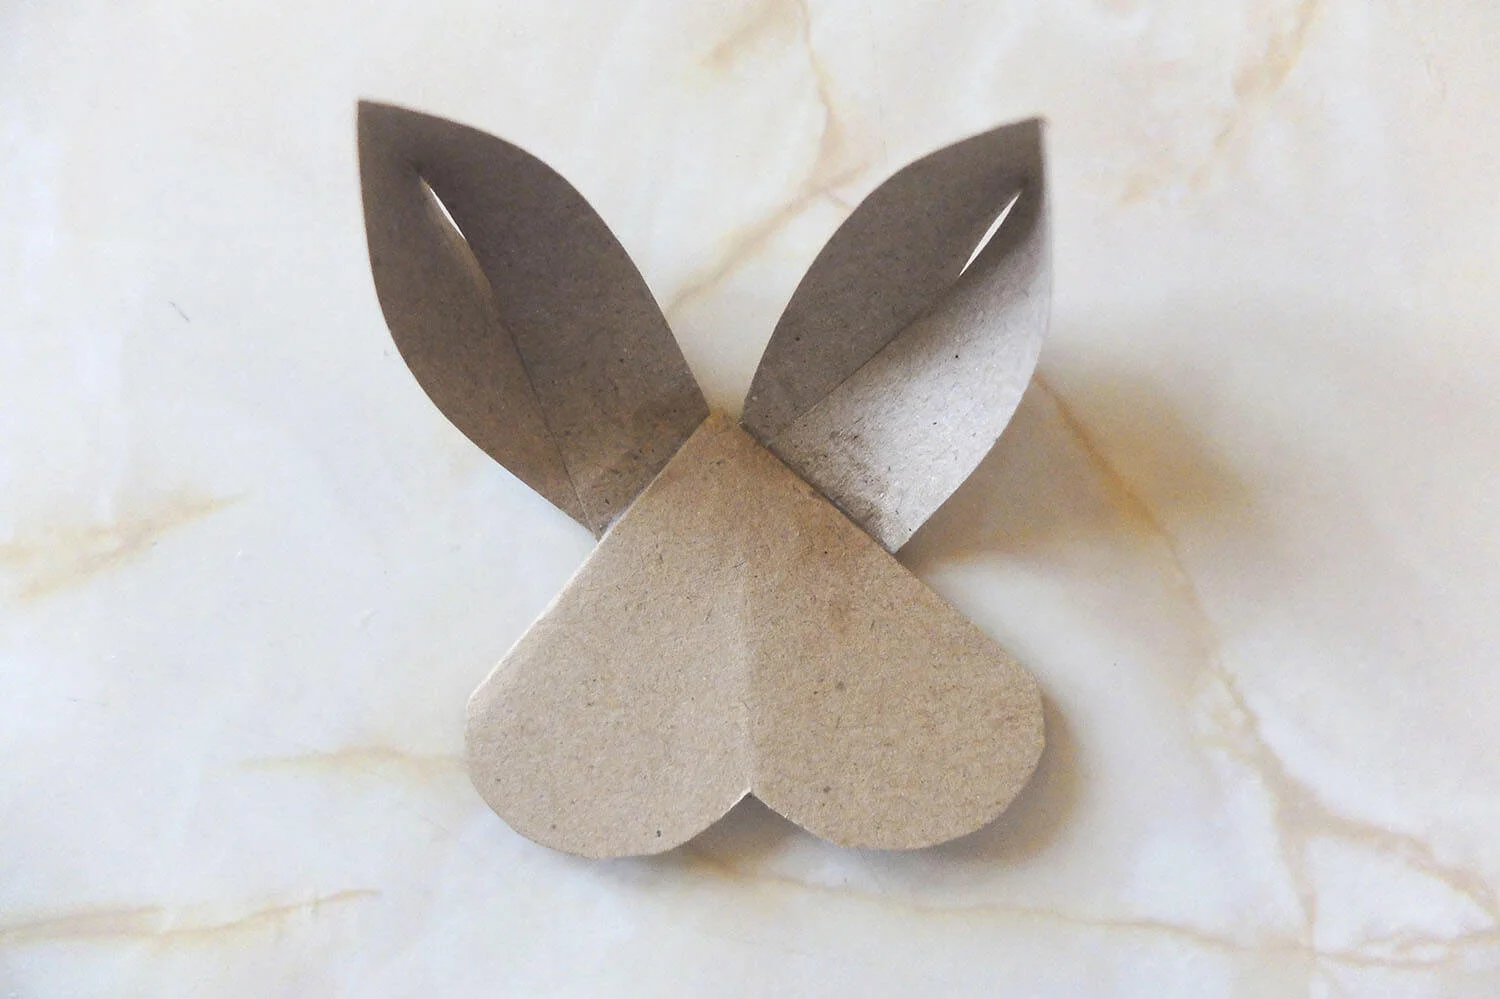
How to make the ears
Using your ruler draw a line on your envelope just above where you cut out the triangle. It should run parallel with the diagonal bottom edge. Cut along you pencil drawn line.
Fold the long strip in half to mark the middle and cut at the centre to make two pieces.
When you open up one of the pieces it will make an upside-down ‘V’ shape. Overlap the two loose ends with each other and stick them in place to make an ear.
Do this to both pieces and then glue or tape the ears onto the back of the rabbits head.
How to make the face and teeth
Draw on the rabbit’s mouth, nose and eyes. Use a light pink pencil to colour inside the ears and on the nose.
To make the teeth cut out a small rectangle of white envelope or plain paper. Draw a thin black line down the centre and stick it into place so only half of the rectangle is visible.