How to Make a Toilet Roll Knitting Loom
Learn the basics of knitting and create your own friendship bracelets, school bag decorations and more using these homemade toilet roll knitting looms…
What you need:
A cardboard toilet roll, paper towel roll or similar tube
4 or iceblock sticks (or 2 sticks cut in half)
Experiment by adding even more sticks later and see how it changes your knitting!Sticking tape
Wool (any colour you like!)
A ruler
Colouring in pens, paints or craft paper
Optional to decorate your loom
How to make your toilet roll loom…
Use your ruler to measure 2.5cm from the top of each iceblock stick and make a small mark with a pen or pencil.
Tape each stick, at equal intervals, around your toilet roll ensuring that 2.5cm of each iceblock stick is sticking up at the top of the toilet roll.
If decorating your toilet roll loom with decorative paper or drawings, now is an excellent time to do this.Reinforce the sticks with extra tape.
You may also choose to glue small buttons to the top of each iceblock stick (with the buttons sitting on the outside of each stick) to help with your loom knitting later.


How to knit with your loom…
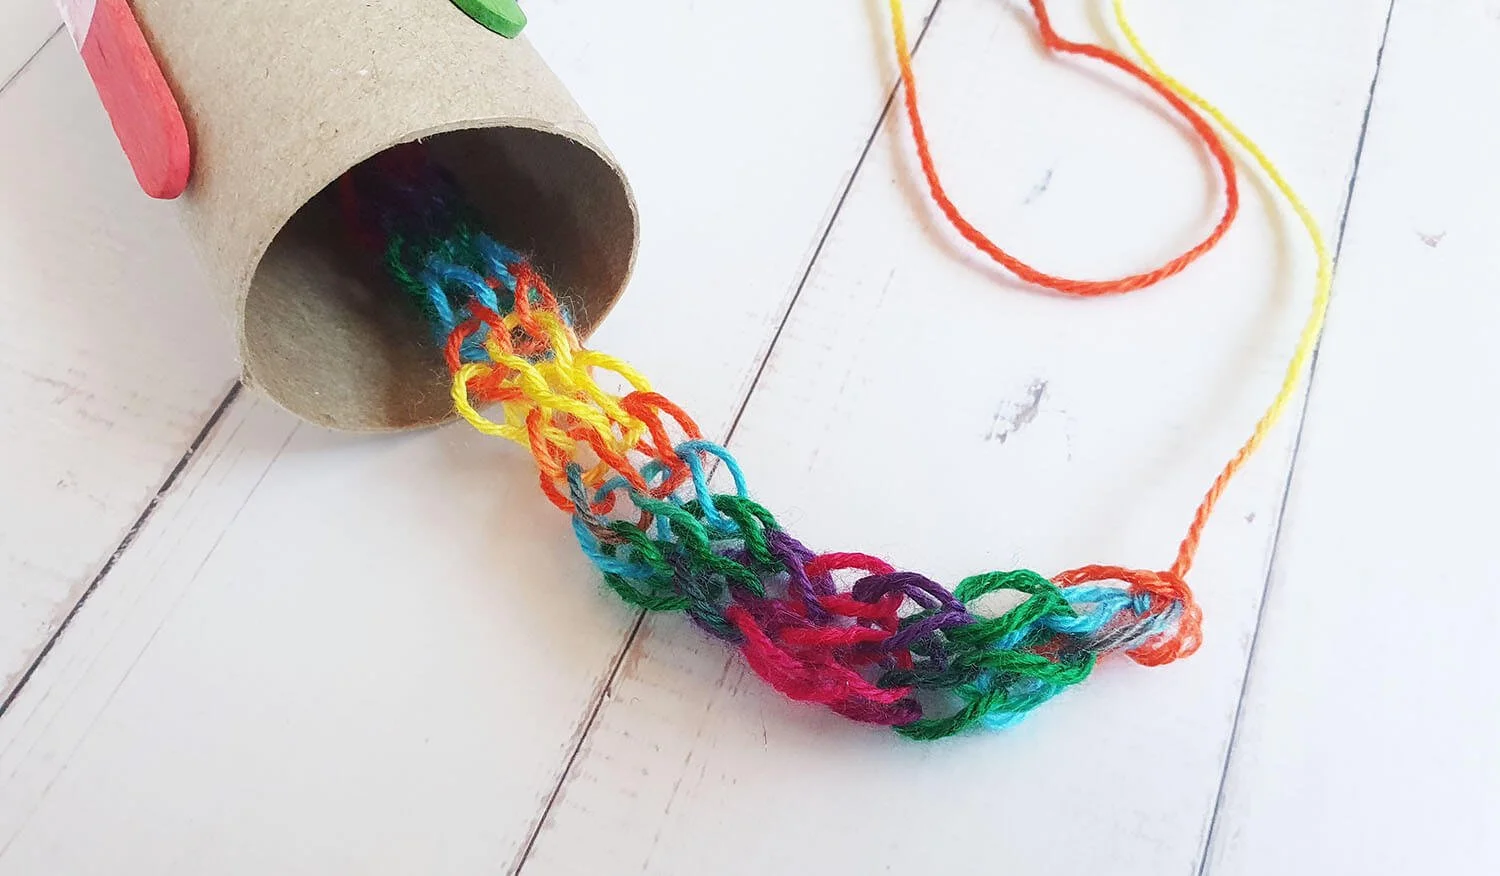
Thread the end of your ball of wool down through the toilet roll so that you have approximately 6cm hanging out of the bottom. Keep a gentle hold of this tail, as you knit.
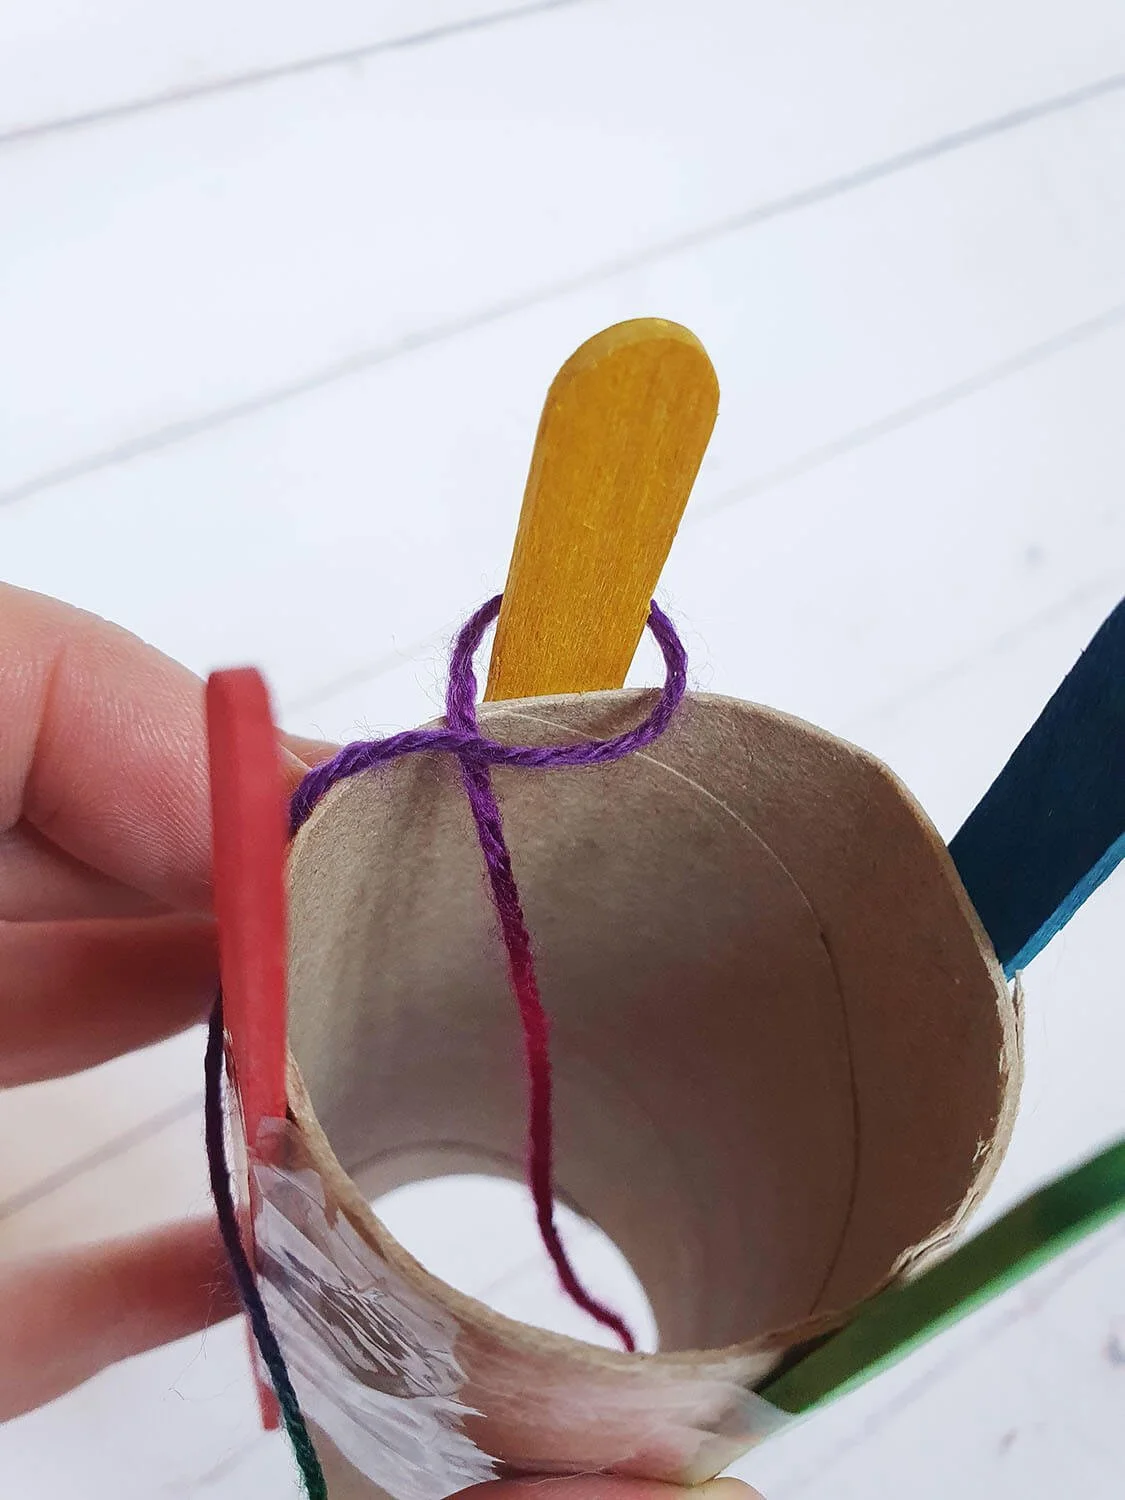
For the rest of the knitting process, you’ll be working from the ball of wool end.To begin your knitting, loop your wool around on craft stick in a clockwise direction once (see photos 2 and 3 below).
Next, take the wool to the second stick (on the left of the one you started on) and wind it once around that stick in a clockwise direction. (see photo 4 below).
Move to the third and fourth stick and repeat the clockwise loop on each stick (see photo 5 below).
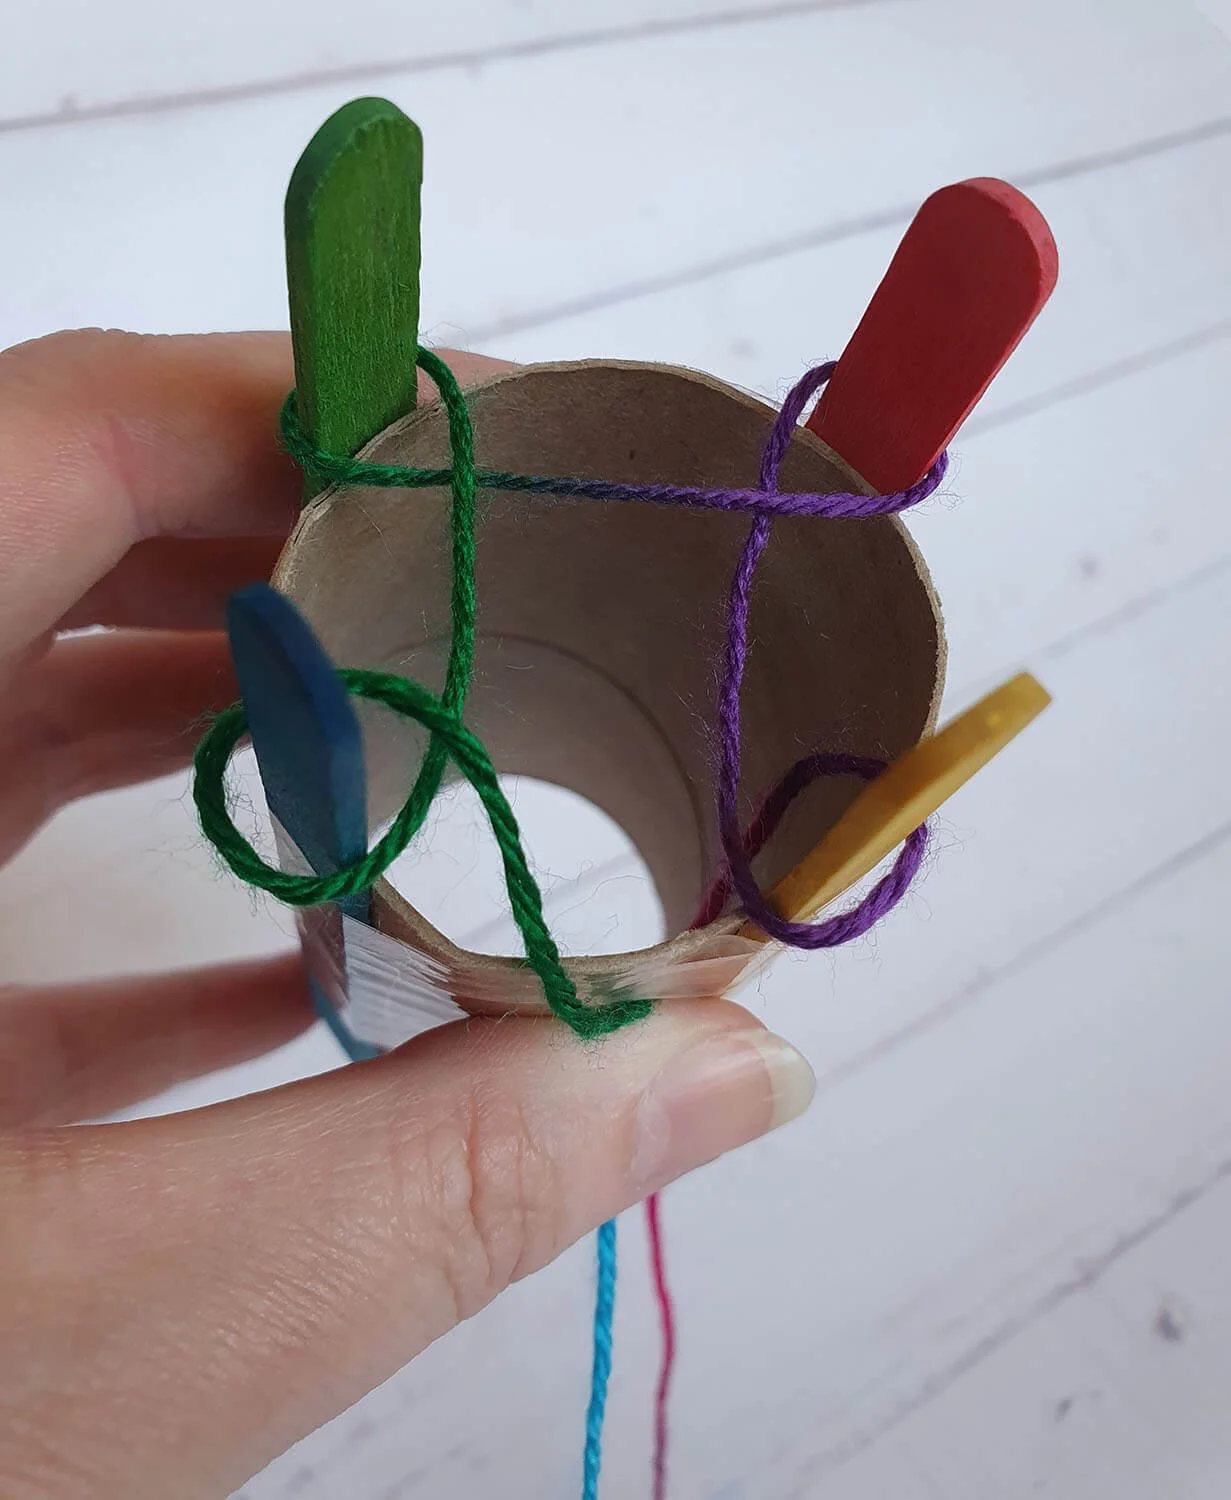
Once each stick has a loop of wool on it, return to the first stick and lay your wool just above the wool loop that you already have in place (see photo 6 below. The existing wool loop is purple, and we have laid the green wool above it).
Using your fingers (or a wooden skewer, if you prefer), gently pull the bottom stitch (pictured below in purple) over the one over it. Continue to pull the stitch over the top of the craft stick (see photos 7 and 8 below).
Continue this process of laying the wool across each stick, pulling the bottom stitch over the top one and then over the iceblock stick. As you do, gently tug on the tail of wool you threaded through your toilet roll at the start to tighten up your stitches.
The more times you repeat this process, the longer your knitted project will get.


How to complete/cast off your project…
When your knitted project is the length you desire, you’ll need to “cast off” or complete your project in a way that ensures all your knitting won’t unravel when you take it off the loom. To do this, follow the instructions below:
Measure approximately 6cm from the end of your wool ball and cut your wool.
Using your fingers, slide the wool end that you have just cut free from your wool ball up under the stitch on your first iceblock stick and slip the loop off the ice block stick (see photo 2 below).
Repeat with the three remaining iceblock sticks until your knitting is no longer attached to your loom.
Tie a knot at each end of your knitting to secure it.


What to do with your knitting…
There are all sorts of things that you can use your knitted braids to make. Here are just a few ideas…
Make friendship bracelets
Add clips and pom poms to create school bag decorations
Embellish headbands
Create necklaces
Use as bookmarks
Transform into decorations using beads
Do you have other ideas for your knitted braid? Let us know below…


Did you give it a go?
Send us a photo of your knitted braids and you might find your creation featured on the Upstart website OR in a future issue of Upstart magazine… AND win a prize!