How to make a Pohutukawa ornament
Gifts that are made with love mean the most. Try making this Pohutukawa ornament for friends and family so that they’ll be able to remember you every Christmas (as they decorate their tree).
REMEMBER: always ask permission & help from a grown-up using a craft knife

What you need:
Red/crimson polymer clay (we used Du-kit)
Gold or yellow polymer clay
Green polymer clay
A craft knife, kebab stick or clay carving tools
Ribbon or string
Card or an old board to protect your work surface
What to do:
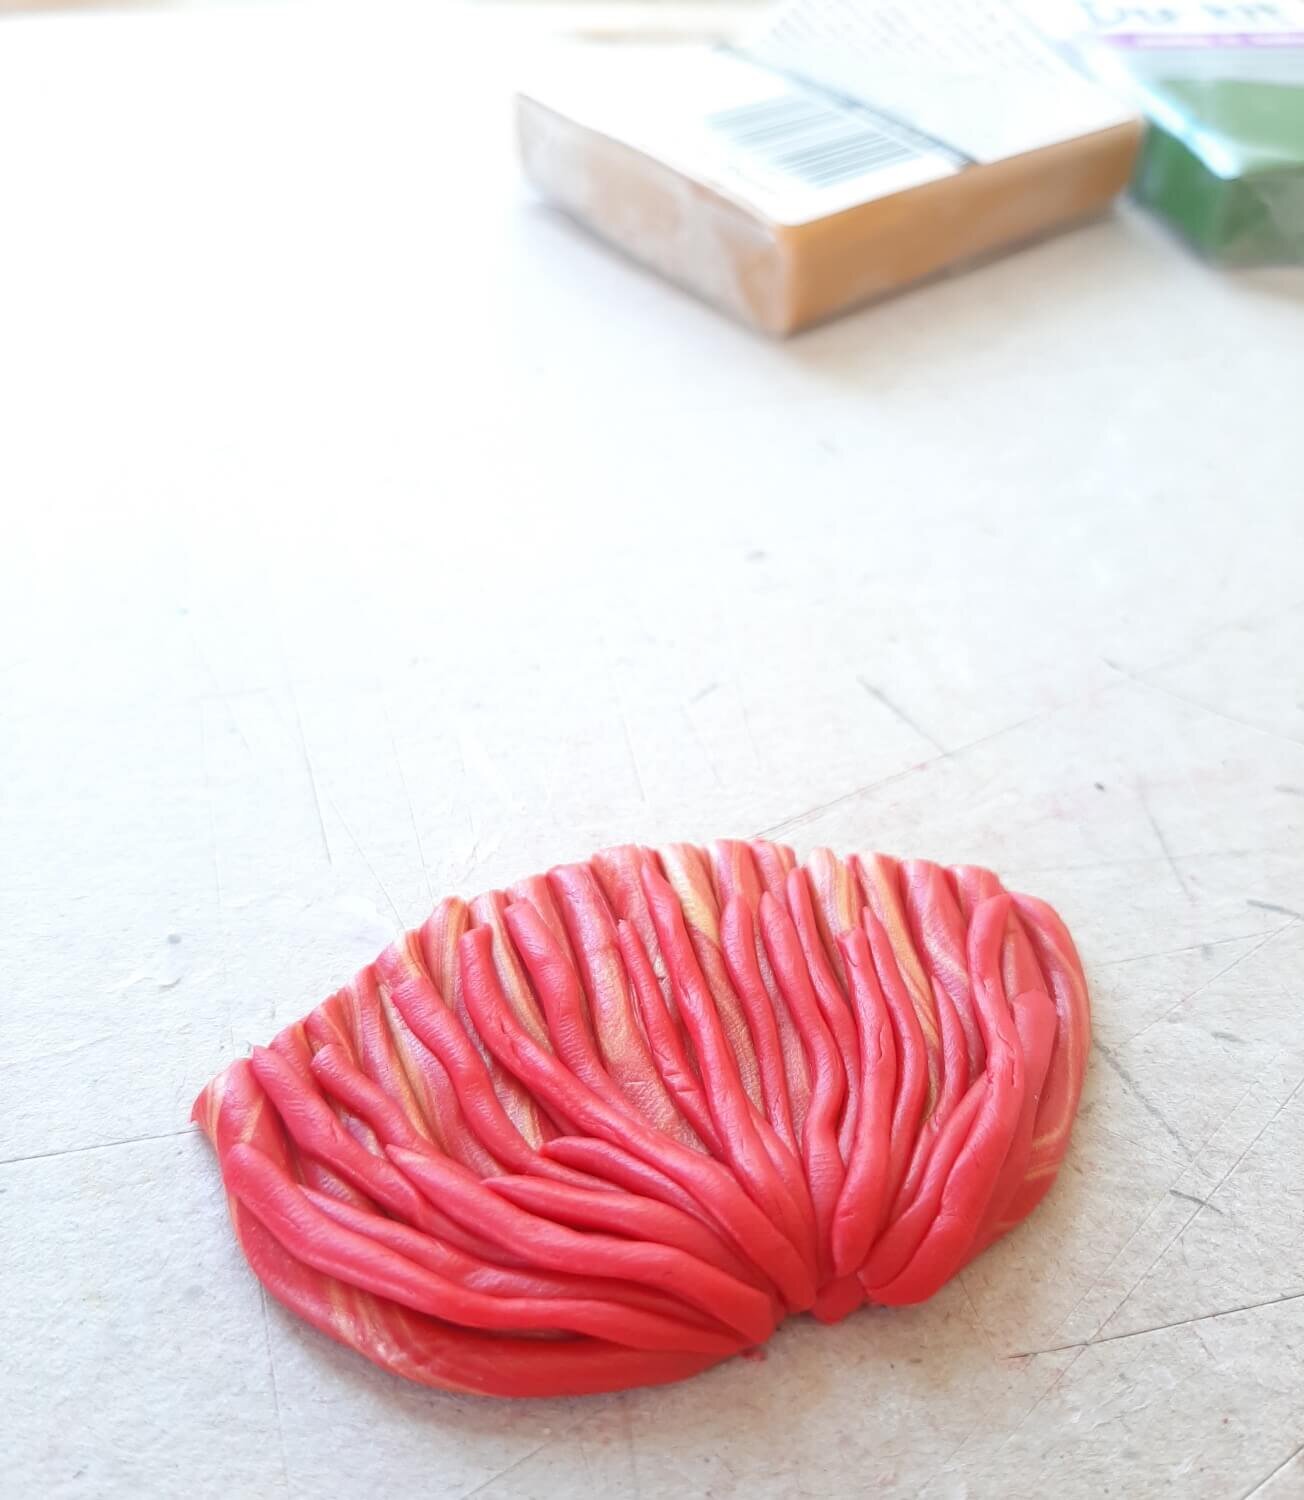
To get the perfect Pohutukawa flower colour, mix a small ball of the red and gold clay together to create a marbled effect.
Tip: Rolling a “sausage” of each colour together can be a great way to achieve this.Next, roll your marbled clay into very thin little sausages and pack them next to each other until a rough fan shape is formed.
Mark a line across your flower where you would like to neaten the tops of the petals. This will help you to create the perfect shape.
With help from an adult, cut the flower to shape with your knife, by following the line you have marked.
Create more thin petals, but this time with the plain red clay and press them onto the top of your clay flower. This will give more depth to your piece.
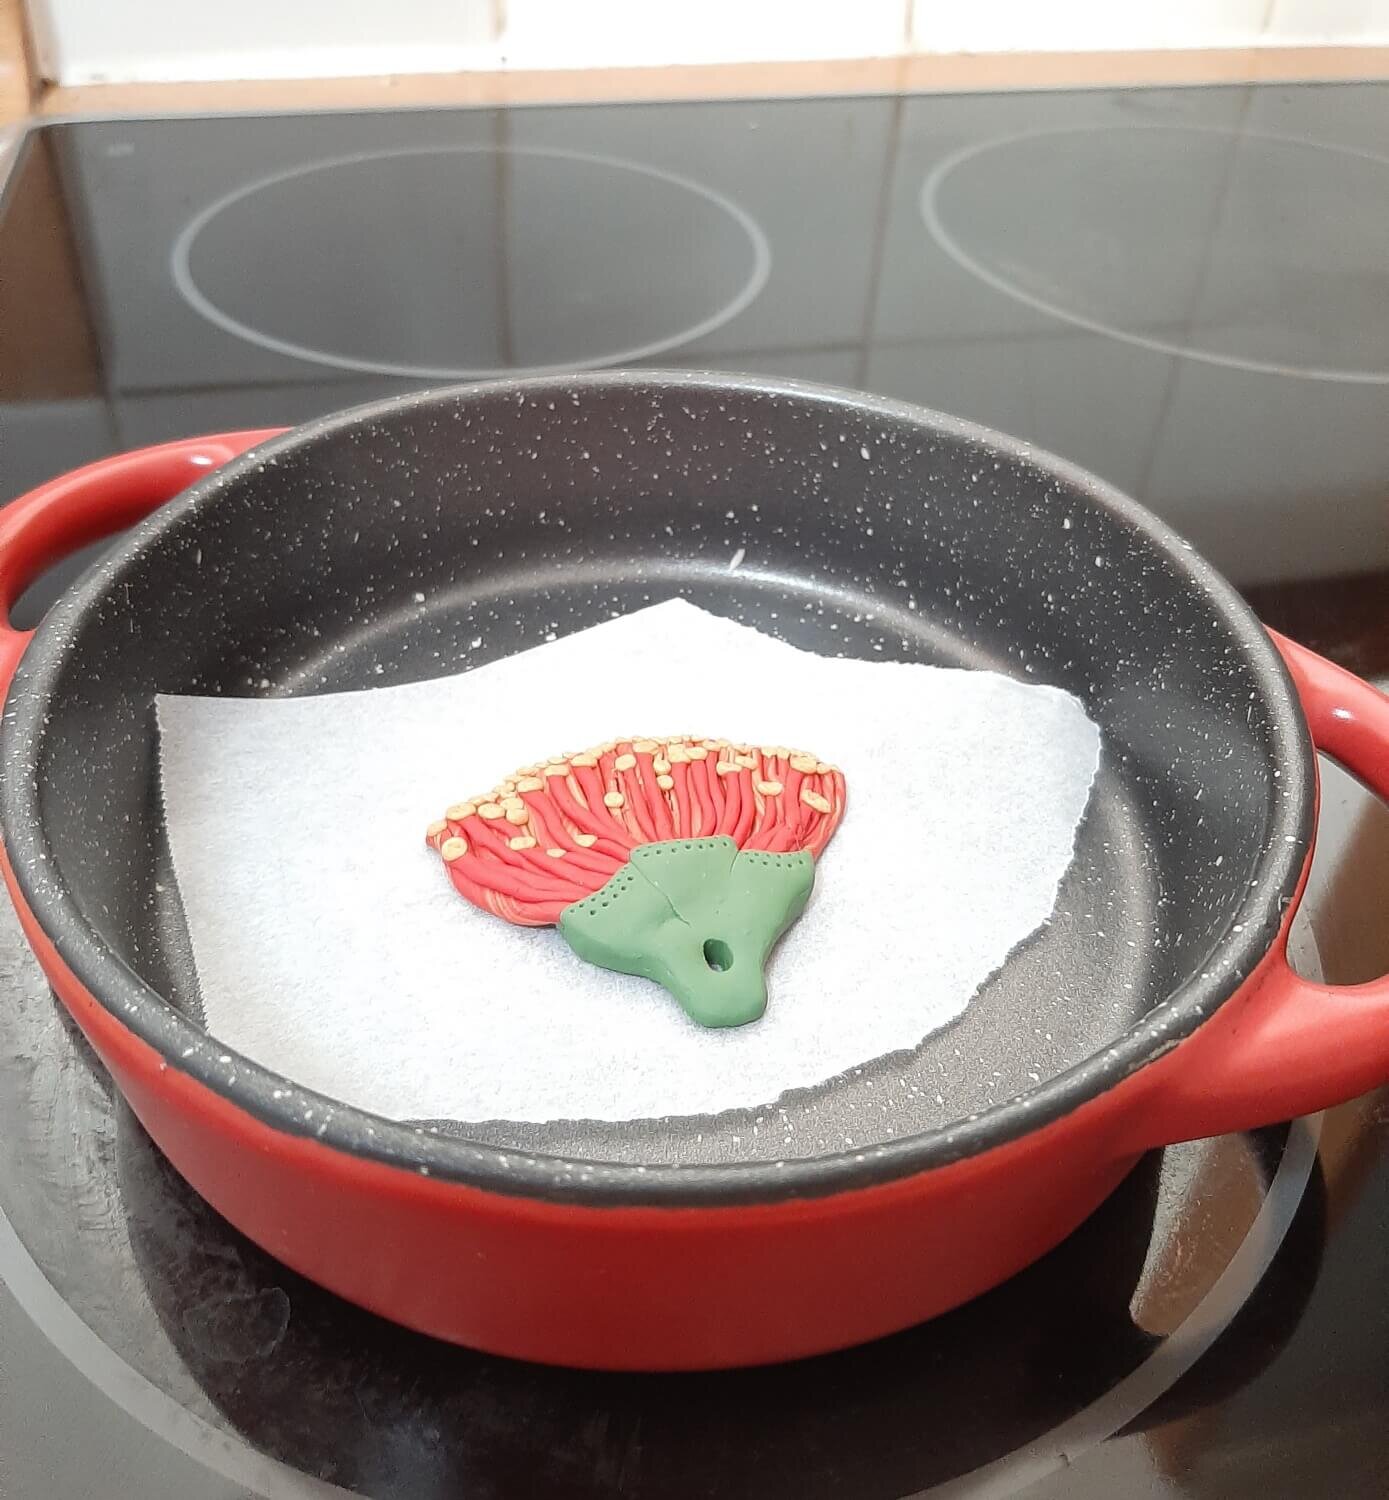
Using the flat end of the kebab stick, press a small ball of gold clay onto the end of each of the petals, (on the real plant these are called ‘anthers’ and they produce the pollen.)
Add a green stalk to your pohutukawa using the green clay.
Make sure the stalk also overlaps and wraps around the bottom of the flower, as it helps to hold the petals in securely, (this is where the ovule and ovary of the pohutukawa would be protected.)Add any final decorations such as dots or other textured features to your pohutukawa ornament.
Using the blunt end of your kebab stick, create a hole in the stem. This is where you will later thread the ribbon.
You can skip this if you don’t want to hang up your decoration. You could turn it into a magnet or broach instead!Bake your creation according to the instructions on the clay’s packaging.
It’s best to use Google with a parent to work out exactly how long it should be baked for.
We baked ours at 110C for 8 minutes and then left it to cool and harden.When your decoration is cool and hardened you can thread your ribbon through the hole. Then it’s ready to be gifted to someone that you love.
We all need to plant more native trees to help to impact climate change and create a better environment. Pohutukawa are our native Christmas trees so why not plant one in your garden this holiday! Imagine how lovely that would be!
Did you give it a go?
Send us a photo of your craft and you might find your pohutuakawa featured in a future issue of Upstart magazine… AND win a prize!