How to Make a Magic Winter Night Light
This little glowing scene in a jar is the perfect craft to give you a cosy feeling this winter. With the flick of a switch and a sprinkling of imagination, a paper cut-out comes to life.
REMEMBER: always ask permission from a grown-up before using scissors and craft knives

What you need:
A recycled clean jar
Black card that is sturdy but bends without creasing
Solar-powered or battery-powered lights (with a separate/extendable switch is easiest)
Yellow cellophane
Cotton wool and/or white tissue paper
Piece of string or ribbon for decoration (optional)
Craft knife (and help from an adult)
Scissors
Double-sided tape
What to do:
Scene Size
You need a piece of card that will fit around the inside of your jar. So, wrap the card around the outside of your jar and neatly trim it as needed.
You also need to make sure that the card won’t stick out of the top of your jar, so measure and mark the highest point you want your scene to go then neatly rule and cut out your strip of card.
Imagine and Draw
Draw your scene onto your card with a pencil making sure there is a thick straight margin running along the bottom of the scene – this will be used to stick your scene down with double-sided tape.
Scene ideas:
We created a little evening village scene with houses and a church with glowing windows. You could also add in castles, cottages, trees or towers. You could create silhouettes of people, animals or magical creatures.
For more inspiration have a look at some of your favourite books, art or photos
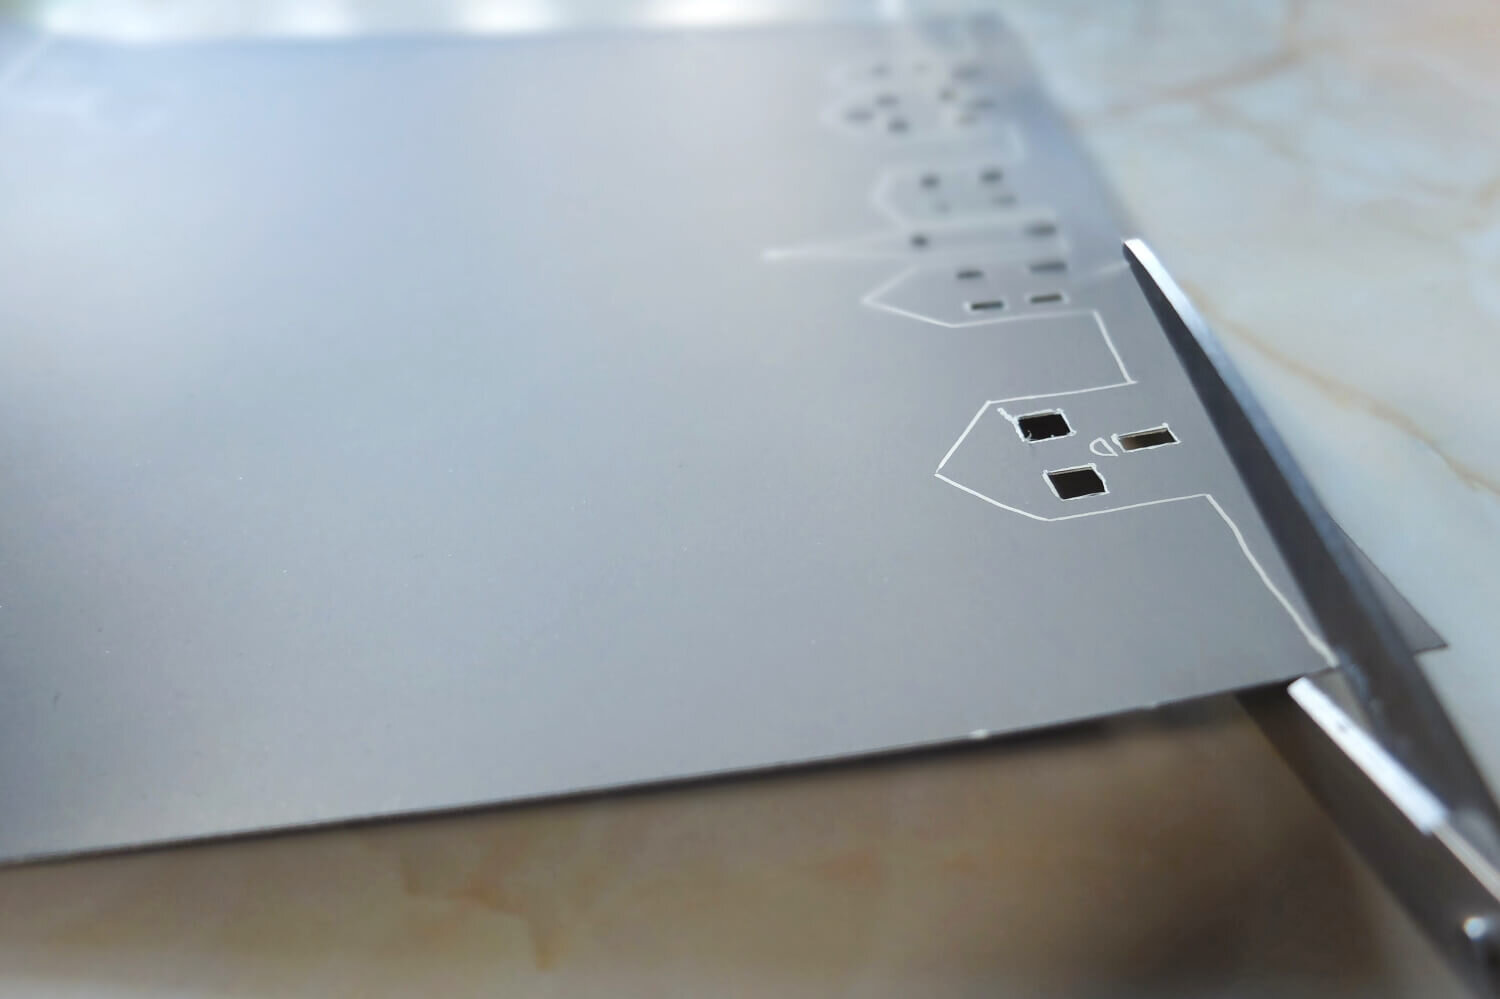
Snip and Stick
Get an adult to help you to cut out any intricate spaces in your scene with a craft knife. Then, with adult supervision, you can cut the main shape of your scene out with scissors.
Stick the thick margin of your scene to the inside of the jar with double-sided tape.Add a Glow and Clouds
To add a warm cosy glow to your scene cover the jar in one layer of yellow cellophane and secure it at the back using double-sided tape and string or ribbon around the neck of the jar. Now, insert your lights and switch them on!
To create the clouds, pull, tear or scrunch the cotton wool or tissue paper to get different effects and push it into your jar against the sides to create clouds.
Play with the clouds and lights until you have your desired effect.
A Sprinkling of Magic
If you were to shrink down and go into the jar where would you be? Who would you meet? What would you see hiding in the shadows? What happens when the lights come on? What happens in the day when the lights are off?
Use these questions to help you to create a magical story for your world, who knows the tale may even come true...
Did you give it a go?
Send us a photo of your Magic winter Jar and you might find it featured in a future issue of Upstart magazine… AND win a prize!